glitter pumpkin {diy}
Summer has come to an end and it is finally fall! Fall is my absolute favorite time of the year! I want all the boots and all the sweaters and all the scarves all the time. I also love decorating for all the fun fall holidays and trying to find new and unique ways to use my existing decor. Our new house is so much brighter than our old bungalow in Savannah so one of my challenges has been to make our very autumn color decorations blend with our new palette of blues and grays.
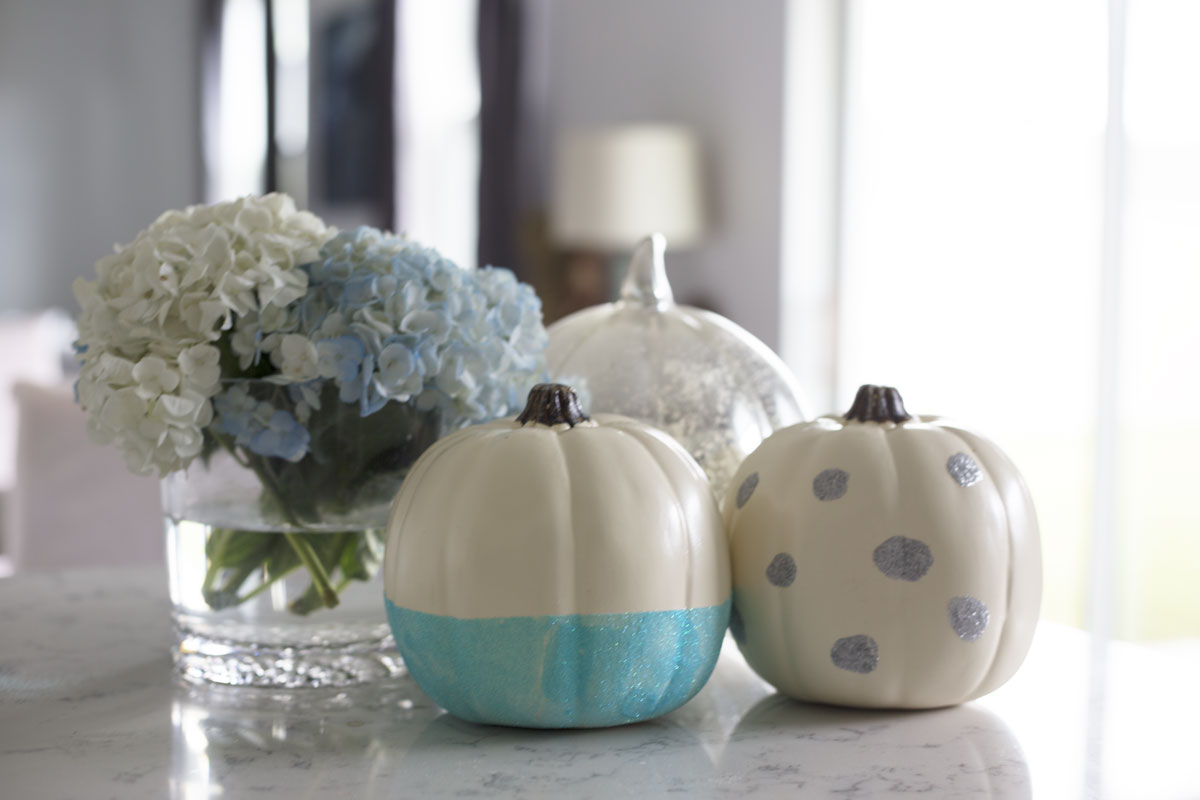
My glitter pumpkins have been one of my favorite transformations so far – and SO easy. I had these white craft pumpkins already and just brightened them up a bit with some mod podge and some Martha Stewart fine glitter. The craft pumpkins are from Michaels and they have a few different sizes. I can’t wait to make a few more and line them down the center of my dining table! Happy fall ya’ll!
DIY Glitter Pumpkins
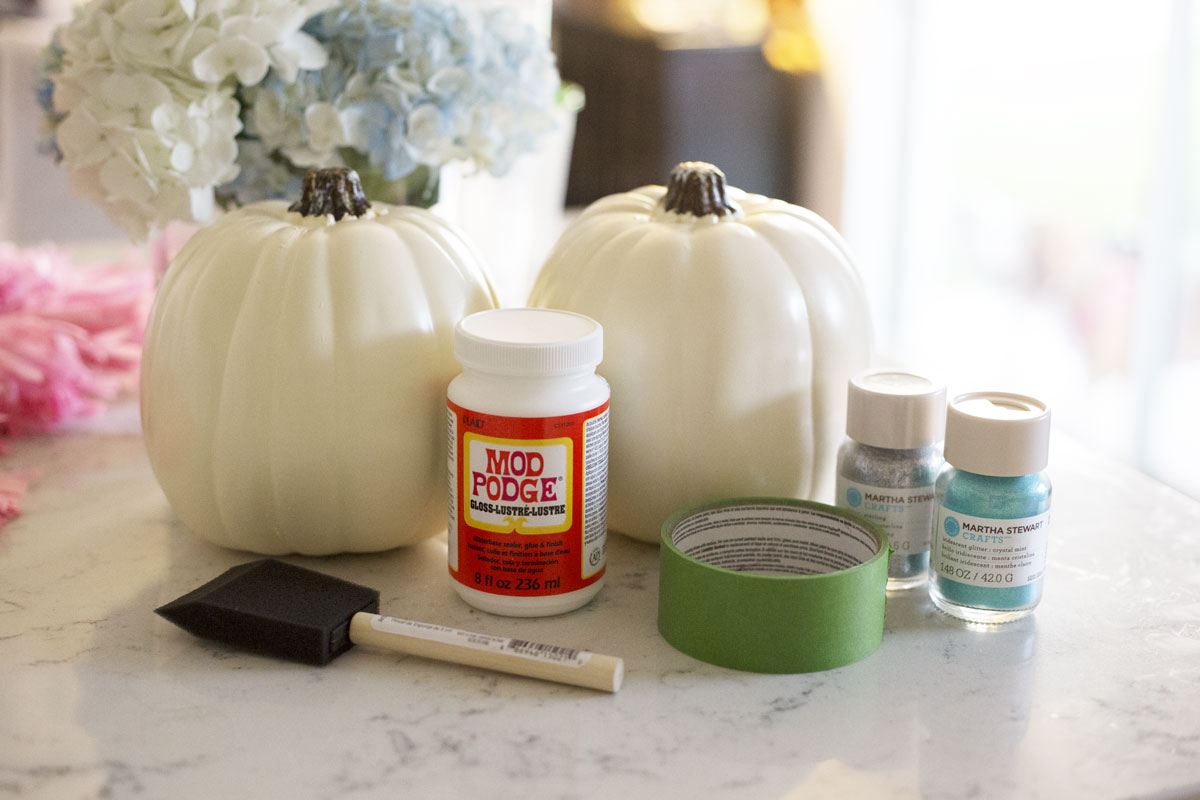
* white craft pumpkins (mine are from Michaels)
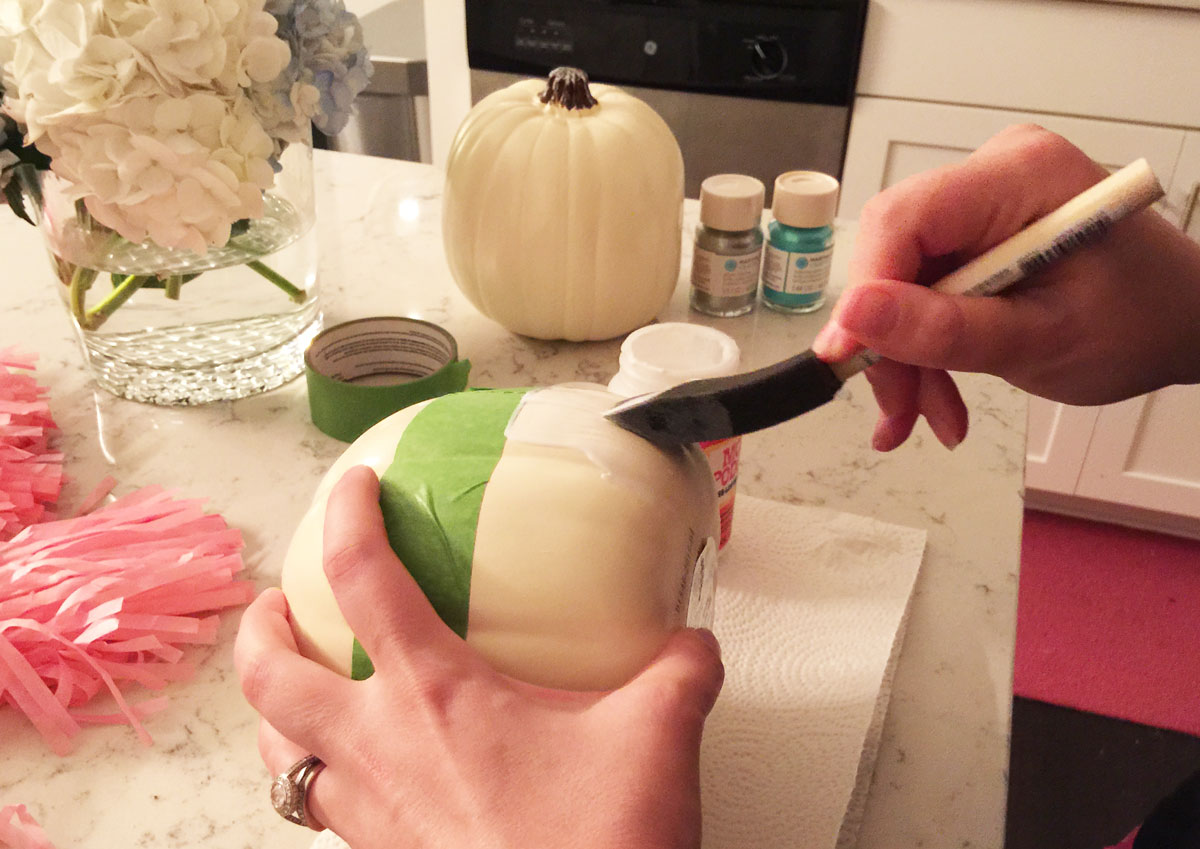
* painter’s tape (only needed if you want to create a clean line)
* mod podge
* foam brush
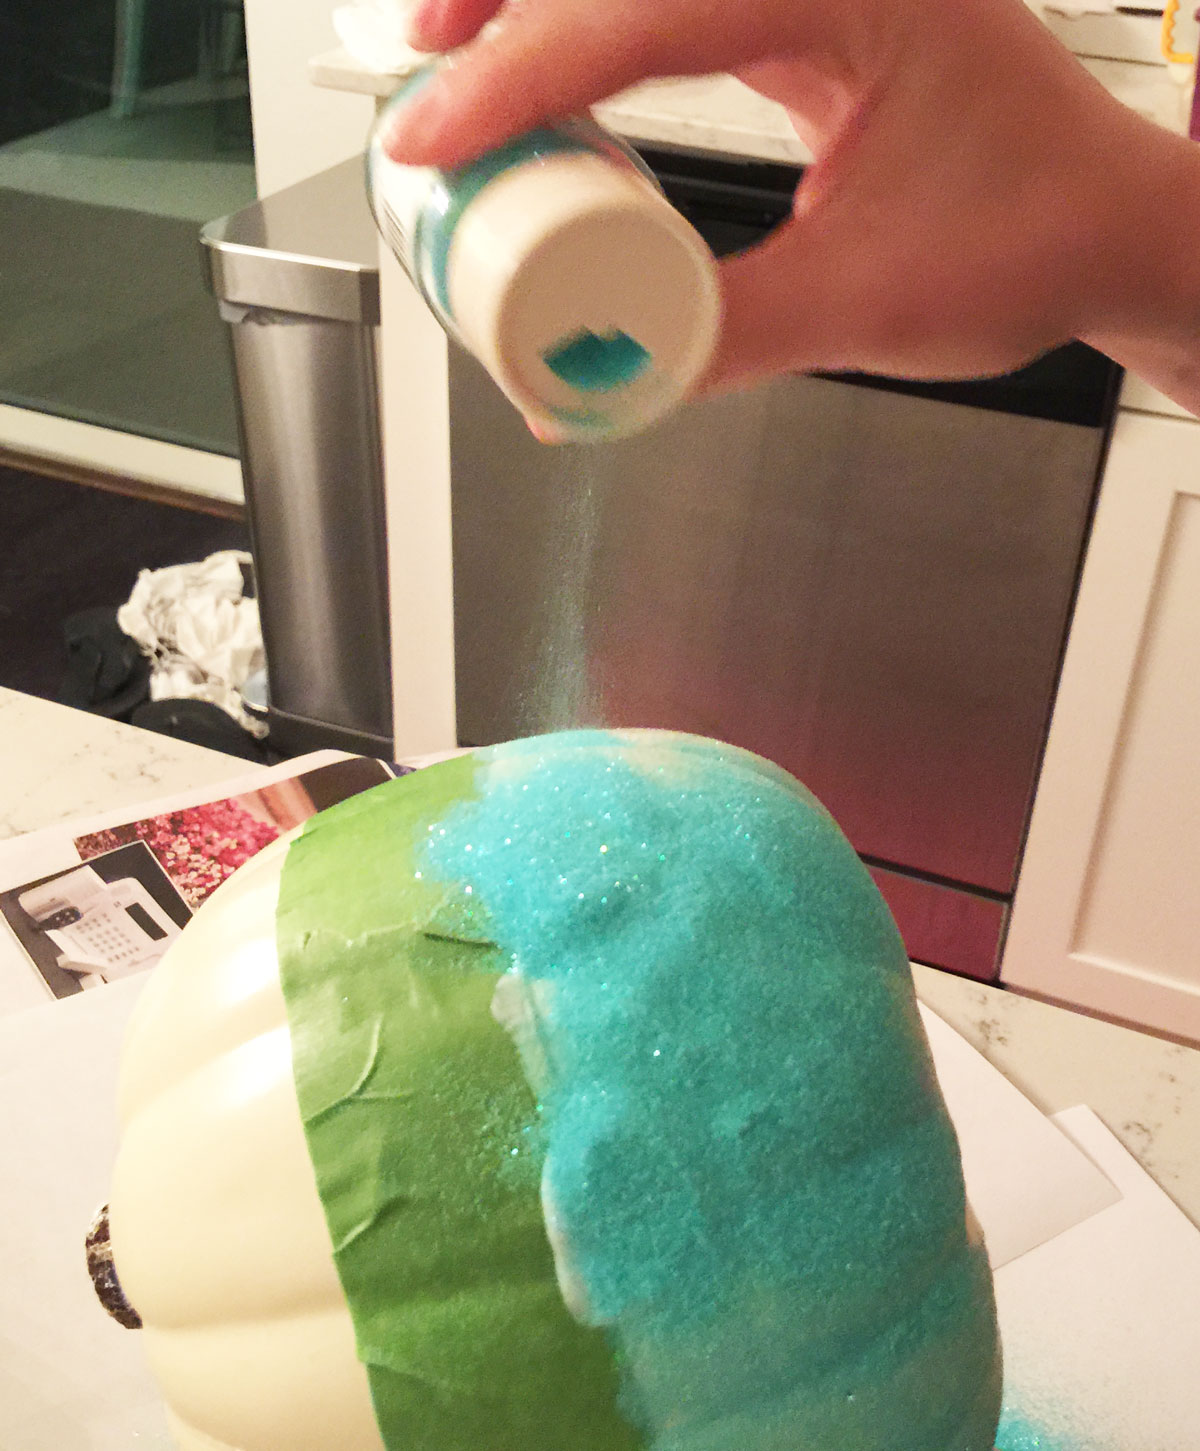
* glitter (I used a super fine Martha Stewart glitter)
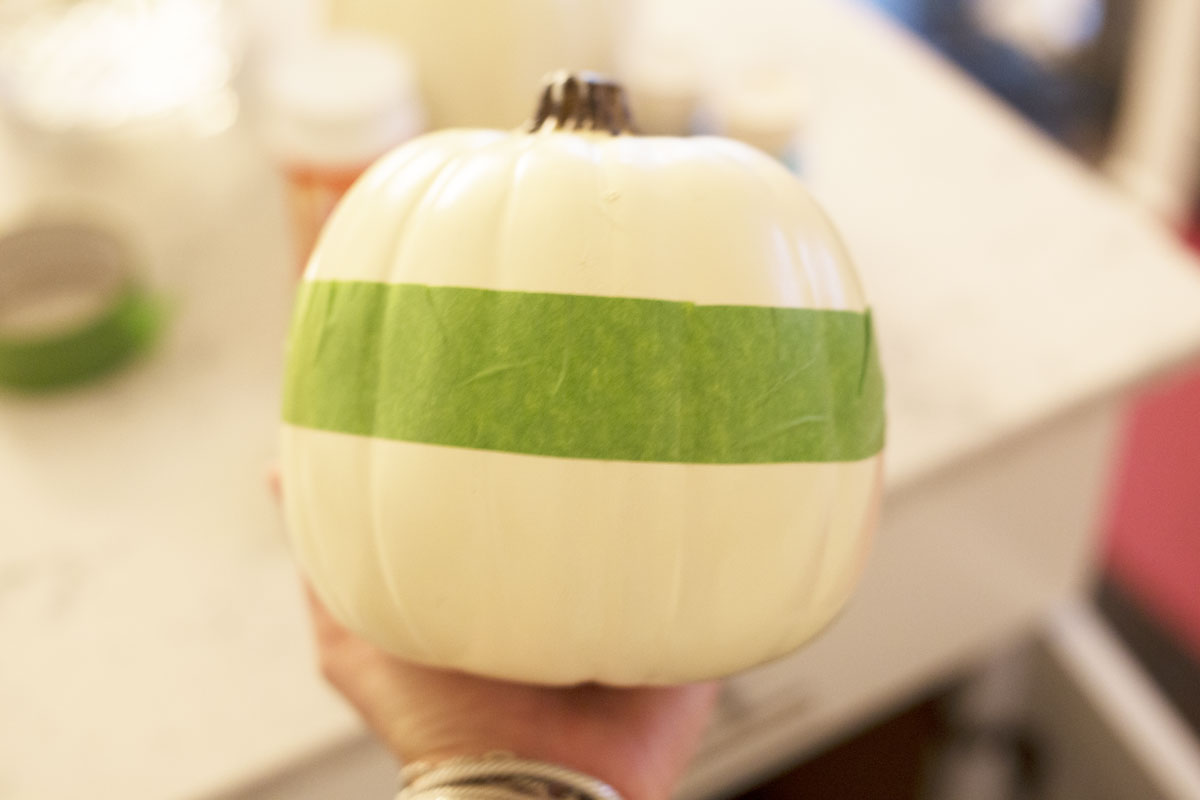
Here’s the time to really get creative. I went pretty simple for mine, but you can really make whatever design you want! It would be super fun to do a monogram or a few different sized stripes too! If you want a clean line, use the painter’s tape to create a section on the pumpkin to tape off. Then use the foam brush to paint on the mod podge. Work in sections so the mod podge doesn’t have time to dry. Pour the glitter on the mod podge over some scrap paper and tap off extra. After you have completed all of the project, you can pour the extra glitter back into the bottle. Give the glitter about 6 hours to fully dry and then paint another layer of mod podge over the dried glitter to set it. Remove tape after second layer has dried. Have fun crafting!